

Planning a maternity photo session with ultrasound images means combining two of pregnancy's most emotional milestones into one lasting keepsake. The ultrasound image is not just a prop. It is a narrative anchor that connects your baby's first portrait to the moment you hold it in your hands. Done right, this type of session captures something no standard maternity shoot can: the physical reality of your baby's presence before birth. This guide walks you through timing, preparation, creative integration, and session flow so you can walk in confident and walk out with photos you will keep for life.
When is the best time to schedule a maternity photo session?
Timing is the single biggest factor in how your photos turn out. The optimal window for a maternity shoot falls between 28 and 34 weeks of pregnancy. Your bump is full and round, you still move comfortably, and fatigue has not yet peaked. Most photographers point to 32–34 weeks as the sweet spot.
Book your session during the second trimester, even if your shoot is planned for later. Popular photographers fill their calendars weeks out, and waiting until the third trimester limits your options. Booking early also gives you time to schedule a prenatal ultrasound appointment before the shoot, so you have a fresh, high-quality print ready to use as a prop.
Timing shifts if you are carrying multiples or have a high-risk pregnancy. Your body changes faster, and comfort decreases earlier. Talk to your healthcare provider before locking in a date. Ultrasound schedules vary significantly by individual care plan, so your appointment timeline may not match what you see online. Base your planning on your provider's guidance, not general timelines.
- 28–34 weeks: Full bump, good mobility, ideal for most parents
- 32–34 weeks: The most recommended window for visual impact
- Earlier for multiples: Comfort decreases faster with multiple pregnancies
- Book in Q2: Reserve your photographer during the second trimester to secure your preferred date
Pro Tip: Schedule your prenatal ultrasound one to two weeks before your photo session. That gives you time to get a clean, printed copy of the image without rushing.
How to prepare for your maternity photo session
Preparation separates a good session from a great one. Start with clothing. Avoid tight waistbands and bra straps for at least one hour before your shoot. Elastic marks on skin show up clearly in photos and take time to fade. Loose, flowing fabrics or form-fitting stretch materials without seams work best.
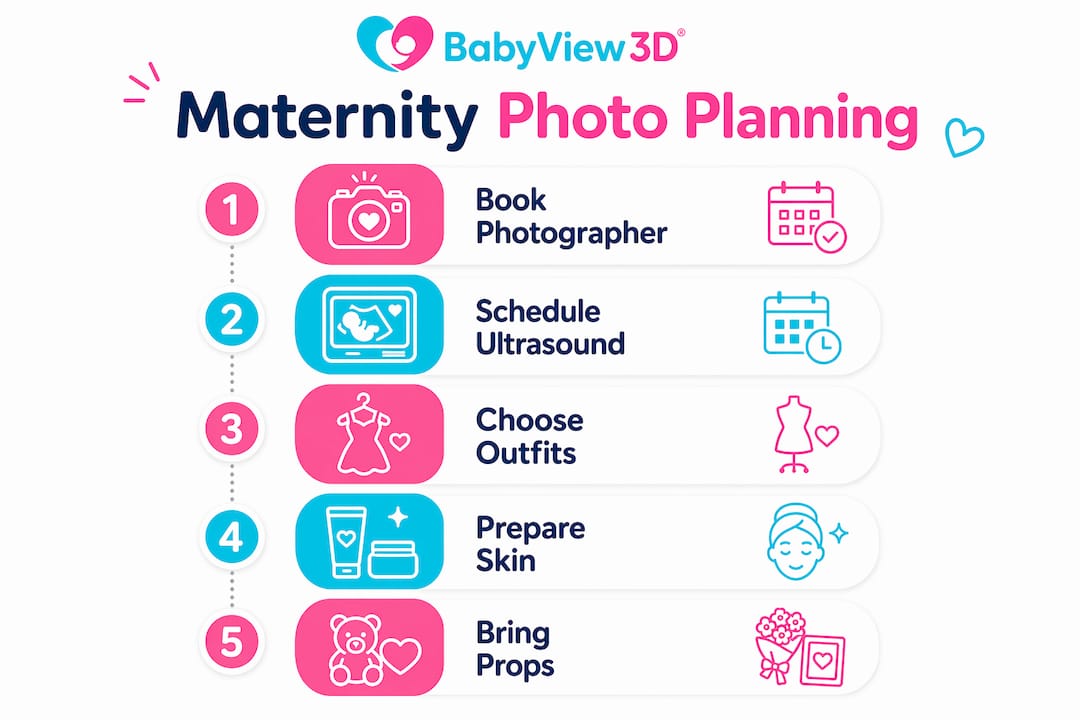
Skin care matters more than most parents expect. Hydrating your belly and moisturizing in the days leading up to the session improves how your skin looks on camera. Drink plenty of water the day before and the morning of your shoot. Skip foods that cause bloating the night before.
Your ultrasound print needs its own preparation. Choose the clearest image from your most recent scan. If you have access to 3D or HD Live imaging through a service like Bbview3d, the level of detail in those prints makes a visible difference in photos. Print on matte paper rather than glossy to reduce glare under studio or natural light. Place the print in a simple frame or protective sleeve before the session.
Here is a step-by-step checklist for the week before your shoot:
- Confirm your photographer appointment and discuss your vision for including the ultrasound image
- Pick up or print your ultrasound image on matte paper
- Choose your outfit and test it for comfort, avoiding tight elastic bands
- Moisturize your belly daily for three to five days before the session
- Prepare any additional props: baby shoes, a name sign, a book, or a family item with meaning
- Rest well the night before and eat a light, non-bloating meal on the day of the shoot
Pro Tip: Bring two outfit options to the session. Lighting and setting can change how colors read on camera, and having a backup gives you flexibility without stress.
Creative ways to include ultrasound images in maternity photos
The ultrasound image works best when it tells part of the story, not when it sits as a decoration. Holding the ultrasound in your hands while cradling your belly creates an immediate visual connection between the image and the life growing inside you. That pose is simple and consistently powerful.

Placing the ultrasound image gently against your bump for a side-profile shot creates a dual focus: the baby's face on the print and the shape of your belly in the same frame. This works especially well with a framed image, which adds a finished, intentional look. Families who want to understand why framing matters often find that a simple frame elevates the photo from casual to keepsake-quality.
Lighting is the most overlooked technical factor when photographing ultrasound prints. Soft, directional light prevents glare and keeps the image readable in the final photo. Avoid direct flash pointed at the print. Ask your photographer to test the angle before shooting. Backlighting the print slightly can make the image glow without washing it out.
Here are the most effective ways to incorporate your ultrasound image:
- Hand-held close to belly: The most emotionally direct pose; works in both studio and outdoor settings
- Framed on a surface: Place the frame on a chair, shelf, or blanket as part of a styled scene
- Tucked into baby items: Lay the print inside a pair of baby shoes or next to a folded onesie for a detail shot
- Held by a partner or sibling: Adds family depth and creates a natural, candid moment
- Taped gently to the bump: A bold, graphic pose that works well with black-and-white editing
Pro Tip: Bring a small easel or picture stand to your session. It keeps the framed ultrasound upright for styled shots without needing someone to hold it the entire time.
Tips for a smooth maternity session with ultrasound celebration
The session itself goes better when everyone knows their role. Including your partner or children adds emotional depth and variety to the final gallery. A partner holding the ultrasound while you cradle your belly creates a natural, connected image. A toddler sibling peering at the print produces candid moments that staged poses cannot replicate.
Follow your photographer's lead on posing, especially when holding props. Ultrasound prints are small, and the angle at which you hold them affects whether they read clearly in the final image. Your photographer will adjust your hand position, tilt, and distance from the camera to get the print in focus without losing your expression.
Pre-shoot consultation with your photographer reduces anxiety and builds the trust needed for authentic photos. Share any concerns about body image, physical discomfort, or poses you want to avoid. A good photographer adjusts the session to fit your comfort level, not the other way around. That conversation also gives you space to share the emotional story behind your ultrasound image, which helps the photographer frame it with intention.
Common mistakes to avoid:
- Wearing tight clothing the morning of the shoot without giving skin time to recover
- Skipping the pre-shoot consultation and arriving without a shared vision
- Using a glossy ultrasound print that catches glare under studio lights
- Forgetting to bring a backup copy of the ultrasound image in case of damage
- Overloading the session with too many props, which dilutes the focus on the ultrasound and the bump
Taking breaks is not optional. Pregnancy is physically demanding, and a one to two hour session requires stamina. Tell your photographer when you need to sit, drink water, or simply pause. The best photos come when you feel comfortable, not when you push through discomfort.
Key Takeaways
A maternity photo session with ultrasound images succeeds when timing, preparation, and creative prop use work together to tell a single, clear story about your pregnancy.
| Point | Details |
|---|---|
| Optimal timing | Schedule between 28 and 34 weeks; book your photographer during the second trimester. |
| Ultrasound print quality | Use matte paper and high-detail imaging for a print that reads clearly in photos. |
| Lighting for the print | Use soft, directional light to prevent glare and keep the ultrasound image visible. |
| Family involvement | Including a partner or sibling adds emotional depth and natural, candid moments. |
| Pre-shoot consultation | Share comfort concerns and your ultrasound's story with your photographer before the session. |
What I have learned from watching families plan these sessions
Most parents treat the ultrasound image as an afterthought. They tuck it into a bag, pull it out when the photographer asks, and hold it awkwardly because no one discussed how to use it. That is the single biggest missed opportunity in this type of session.
The families who get the most out of these shoots treat the ultrasound as the emotional center of the session, not a supporting prop. They arrive knowing which image they want to use, why it matters to them, and how they want to hold it. That clarity shows up in every frame. You can see it in the way they look at the print, not at the camera.
Early planning also changes the energy of the session. Parents who book months out and schedule their prenatal ultrasound well in advance arrive relaxed. They have already thought through their outfit, their props, and their story. Parents who plan last-minute arrive stressed, and stress reads on camera.
The other thing I have noticed: the quality of the ultrasound image itself matters far more than most parents realize. A blurry or low-contrast print disappears in photos. A sharp, detailed image from a session that uses HD Live or 3D imaging technology becomes a focal point. Bbview3d's imaging quality, built on over 15 years of experience with certified sonographers, produces the kind of prints that hold up beautifully in maternity photography. That detail is worth planning around.
— LENIER
Bbview3d: where your ultrasound image starts
The ultrasound image you bring to your maternity shoot is only as powerful as the quality behind it. Bbview3d specializes in prenatal imaging using 3D, 4D, and 8K HD Live technology, producing prints with the kind of detail that translates directly into better photos. With certified sonographers, centers across the United States, and over 15 years of experience, Bbview3d creates the visual keepsakes that make maternity sessions genuinely memorable. Explore the full range of prenatal imaging services or browse the session gallery to see what a high-quality ultrasound image looks like in a real maternity shoot.
FAQ
When should I book my maternity photo session?
Book during your second trimester and plan to shoot between 28 and 34 weeks. The 32–34 week window gives you a full bump with enough mobility for varied poses.
How do I avoid glare on my ultrasound print in photos?
Print your ultrasound on matte paper and ask your photographer to use soft, directional light rather than direct flash. Test the angle before shooting to confirm the image reads clearly.
What clothing should I avoid before a maternity shoot?
Remove tight waistbands and bra straps at least one hour before your session. Elastic marks on skin take time to fade and show clearly in photos.
Can I include my partner or other children in the session?
Yes, and photographers recommend it. Including family members adds emotional variety and creates candid moments that posed solo shots cannot replicate.
Does the quality of my ultrasound image affect the photos?
A sharp, high-contrast print from a detailed scan reads clearly on camera. Low-quality or blurry prints lose definition in photos, especially when held at an angle or placed near other props. Services like Bbview3d that use HD Live imaging produce prints built for exactly this kind of display.